In search of the perfect tube amp assembly bench

Although all my parts and most of my tools are still in boxes, my household move is complete! It will still be a while before I’m spending free time in the workshop, but it’s never too early to daydream a bit about how I’ll set things up.

I have a blank slate of dry, mostly bare, concrete and studs/joists to work with. Aside from a sump in the corner, I’ll be able to utilize all 15ft x 10ft for my own storage and working space. Coming from space that was split between a garage and a shared basement, the 150 sqft is palatial. That said, my goal is to use it as efficiently as possible.

Amp Work Zones

Taking a cue from kitchen design, I’m planning the room layout by functional zones. Specifically, building tube amps involves three key processes: chassis work, electronics work, and parts/materials storage. Each process is a Russian nesting doll of other steps and tasks, of course, but these three general areas represent unique workflow challenges that are more or less shared by the sub-tasks that make them up.

Chassis Work

  • Messy in terms of generating dust, shavings, waste
  • Work is usually done standing
  • Physically large, sharp, and/or spinning equipment
  • Space has high potential to be used in non-hobby activities

The woodworking-focused area would benefit from mobility. Rooms adjacent to the workshop can be used as ad-hoc work space for projects that don’t fit in the smaller shop. Keeping tools and workbenches on casters will also let me rearrange as the work or materials require. Additionally, being able to moves benches helps with dust cleanup.

The old chassis work space

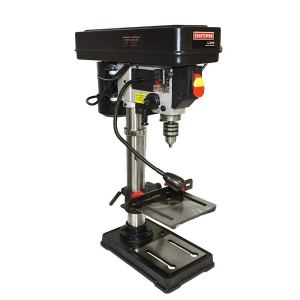
This will probably involve a 8ft+ bench for assembly with an integrated miter saw bay. Space under the bench will house a shop vac (dust control) and extra power tools and tool boxes. My drill press will live on a separate cart, as will my router table, for maximal flexibility.

I need to figure out a good way to deal with casters and the unevenness of basement floors.

Electronics Work

  • Benefits from flexibility in lighting and seated/standing work
  • Equipment is stationary and shelf size, but numerous
  • Results in many small parts used simultaneously

I’m planning to reuse the t-track chassis cradle I had in my last workbench. This was one of the best ‘tricks’ I picked up for building and working on projects. The rest of the space above the workbench will also be very valuable to keep power supplies, variacs, and equipment close at hand while working on a project. The worktop itself should have some kind of padding.

A project on the “easel”

This will likely also be about an 8ft long bench. I do not see a lot of benefit in making this a mobile bench due to its specialized nature and the manageable size of projects. Owning a CNC is one of my long-term hobby goals, so the extra long bench may come in handy (though it kind of breaks the ‘zone’ philosophy).

I’d like to come up with some kind of solution for keeping component parts organized while they’re out and being used for a build. This could be as simple as having tackle-box organizers on hand.

Parts and Materials Storage

  • Materials typically include long lumber and extrusions and plate under 18″ square
  • Component parts are numerous, but physically small and commodities
  • Tubes and transformers vary widely and some are fragile/valuable

The space has shelving built between studs that will help with storage for some things (mostly paint cans at the moment). Storing long materials high on the wall in a rack makes sense. Aluminum plate could be stored on edge without worrying about it deforming. The numerous component parts, tubes, and transformers, present an interesting challenge though.

In the past I’ve kept tubes in Rubbermaid drawers, but I’ve found that I’ll often forget about what I actually have on hand. Curing that will probably require some way of organizing tubes in a single layer, preferably vertically to conserve floor space. I have had my eye on french cleat style storage walls and am thinking about ways to adapt this to small parts and tubes. The modular nature of it has some potential benefits.

First things first

Before I start cutting too much wood for benches and storage, I plan to give the whole room a good scrubbing and a fresh coat of paint. Other rooms in the new basement have a coat of epoxy that I find to be very appealing, so I will likely treat the floor to make it easier to clean and generally more attractive. I’ll also switch out the bare bulb light fixtures to shop lights and have some additional outlets put in on their own circuit.

Yes, there’s lots to do in the new workshop! I plan on building a simple tube project or two in the meantime. Refreshing my memory of what it’s like to start out without a bunch of tools is probably a great exercise in and of itself!

Workshop toys and a different style chassis

I recently spent some time in the garage workshop on a non-tube project I’ve been meaning to do for quite some time. Up to now, my chassis have all been a mitered box with a lip to inset the top and bottom plates. I cut the lip with a straight edge and a hand-held router. This works fine and produces good results, but setting it up for the cuts was a chore. The better solution for this kind of rabbet with a fixed width/depth is a router table, so that’s what I built!

My new table includes a white-board top, inset aluminum plate for the router, and t-track to adjust the fence distance. The fence has adjustable stops so I can get close to zero clearance and add shims to plane edges or remove small amounts of width from boards. This will all make cutting the same chassis I’ve been doing much quicker. It also opens up some new chassis possibilities:

Here’s a different style chassis that I’ll use in the next preamp build. The sides are still wood and include a lip to inset the top and bottom, but the front plate is 1/4″ aluminum and the back is an aluminum c channel. This will make drilling for jacks and controls much easier than using a 3/4″ wood panel. Making the same enclosure with decent precision would have been much more difficult without the new router table.

More updates to come as I begin this preamp project!

Thomas Mayer’s new site

I’ve followed Thomas Mayer’s hobby website for a long time. He uses a tantalizing mix of high quality transformers and DHT tubes to build some beautiful audio devices. The tube of the month series is also a must-read review of odd-ball tubes and applications.

Now we can all see how much Mayer charges for his impressive tube builds. It’s about what one might expect based on the craftsmanship he clearly puts in and what the audiophile market supports in other products.

Check out vinylsavor.com here. If nothing else, browse the galleries and drool over the very Scandinavian glass, wood and metal work.

vinylsavor.png

Makin’ holes in stuff

Making holes in wood and metal is a big part of the DIY tube amp building hobby, but practical construction strategies aren’t something that get a lot of attention on forums or websites. We (myself included) probably spend 90% of the time in thought experiments and circuit analysis and 5% of the time on fabrication (the last 5% is chasing math and rounding errors).

I usually build enclosures from raw materials: 3/4″ hardwood and 1/8″ aluminum. While this is by no means the only way to do things, here are some of the tips and tools I’ve accumulated for my style of construction. The focus here is on making holes (especially in metal); for tips on making a simple wooden box, see this page.

Drill Press

drill press

You do not need a drill press, but it makes many things easier. A drill press is more stable than a handheld drill and easier to setup for repeatable depth or consistent spacing. Drill presses are more powerful than handheld drills and have more settings for speed, both useful features when using different types of bits and materials.

Limited throat depth is a disadvantage of the drill press. A press advertised as “10 inch” swing or throat depth can drill to the center of a 10 inch piece of material. This means the distance between the chuck and the vertical support is 5″. In my experience, 10 inches is the minimum size press that will be practical with tube amp top plates. Even better if you can fit a 12 inch or larger in your budget and work-space.

Drill presses work best on flat stock. While this isn’t necessarily a disadvantage, it is something you need to plan for while building enclosures. Drill first, then glue and assemble!

In most cases a press is slower to setup for cuts than a hand drill. I still have a good quality battery powered handheld drill when I just need a quick hole for mounting bolts/screws, when placement isn’t critical, or when I don’t have clearance to use a press.

Drill Bits

drill bit pilot point

You don’t need anything super fancy or expensive for drilling in wood and aluminum, but you should invest in a decent set of bits. Regular twist bits with a pilot point have worked great for me in both presses and hand drills. The narrower end on a pilot point also helps with hole placement when cutting to precise locations on the press. I suspect that brad point bits would not hold up well to lots of aluminum/metal drilling and I’ve broken a lot of cheaper standard point steel bits. A bit set with a good coating on it will definitely stay sharp longer.

Bi-metal Hole Saws

holesaw

For cutting out socket holes and holes for mounting large capacitors, I use bi-metal hole saws. I’ve tried punches, but I like working with 1/8″ aluminum and I haven’t found a punch that works for this thicker material. If you’re working in thinner steel, a good set of Greenlee punches may be your best friend.

I cut octal holes with a 1 1/4″ hole saw and 9-pin holes with a 3/4″ (sometimes it’s necessary to enlarge this to 7/8″ depending on the socket and tube). Both of these sizes will work with a handheld drill, but larger sizes for motor run caps really beg for a drill press.

I’ve been very impressed specifically with the Milwaukee Hole Dozer series. They’re easy to find at the big box home improvement stores, the arbor can be swapped between saws, and they’re easy to clean out shavings and stuck plugs. I’ve drilled a lot of octal socket holes without serious dulling of the saw.

Unibit

unibit

Unibit is your BFF for drilling out grommet holes to run transformer wiring. It is also very handy for a quick 9-pin socket hole. I’ve found the 7/8″ size to be perfect for most tube amp needs (anything bigger than this is a hole saw job). Tip: use painters tape to mark your depth on the bit so that you don’t overdrill to the next size larger than intended.

The unitbit has a tendency to grab the stock you’re drilling into. Whether using this with a handheld drill or a press, be sure to super clamp your stock and avoid spinning top plates of death.

Unibits bits aren’t cheap, but they’ll last forever if you get a good quality one.

Countersink Bit

countersink

This one isn’t the most used bit in my toolbox, but I do think it adds a nice touch for top plates. I use these to put the head of mounting screws level with the top plate and to clean up any holes drilled for chassis air flow. These work on wood and aluminum.

Forstner Bit

forstner

The forstner bit is your hole saw equivalent for wood work. A forstner bit allows you to drill circular holes in wood, removing the material to a specific depth. Most jacks and pots do not have much of a bushing on them. If you want to mount jacks and controls in the wooden portions of your chassis, you’ll probably need something like this to reduce the wood to a manageable thickness:

IMG_20171022_125533053.jpg

I use forstners to remove wood from both the inside and the outside of my enclosures, depending on where I want to locate the recess. A good forstner bit leaves a very clean edge so I use them wherever possible in wood. Don’t try these in aluminum.

Jigs

Because I incorporate solid state parts on heatsinks in many of my builds, I drill a lot of holes to vent the chassis:

A thin and flat ruler taped to a straight fence makes a really simple and useful jig for making sure the hole spacing and placement is consistent on the drill press. Pictured below:

IMG_20180902_141052248.jpg

  • First, layout the lines along which you’d like to drill the holes in your plate with a square and a permanent marker (remember to use the mirror image if marking on the underside of the top plate).
  • Second, mark your material along the edge using a square. Exact location is somewhat arbitrary.
  • Now, line up the material and bit to cut the initial hole at your desired starting location (but don’t drill yet).
  • Adjust the fence to line the mark on the material’s edge up with any whole inch mark on the fence/ruler (you see the marked line at the 10″ spot on the ruler in the photo). The material should be flush against the fence at this point.
  • Finally, clamp the fence/ruler combo down securely and recheck that you are drilling the first hole where you want and that the mark on the material’s edge is lined up with a convenient mark on the ruler.
  • Now you can drill the first hole and move the material along the fence to keep the rest of the holes in a perfectly straight line. Using the mark on the edge and the ruler, you’re able to very precisely control the distance between holes.