No workshop, no time, what do?

Having recently moved and had a second kid, tubes should be the last thing on my mind, right? Maybe. Then again,personal hobbies should always have a place in day-to-day life, and especially when that life gets a little chaotic. Such hobbies are about exploration and continuously challenging oneself. And yes, sometimes a little bit of dorky obsession.

Hence, with all my tools in boxes and precious little spare time, I have a great opportunity to revisit quick, cheap, and cheerful tube design (at least this is what I tell myself).

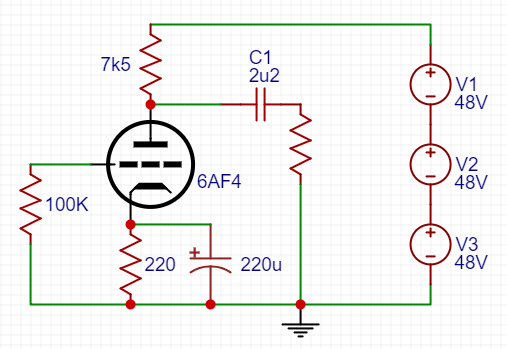
Last spring I posted about a sleeper tube that looked to me like it had potential in a simple linestage. The single triode has modest B+ requirements, low Mu, and respectable transconductance, exactly what we might look for in a bare-bones capacitor coupled preamp. To boot, the tube is called 6AF4. AF. How could I resist?

Here are the plate curves, highlighted where it looks pretty good to me:

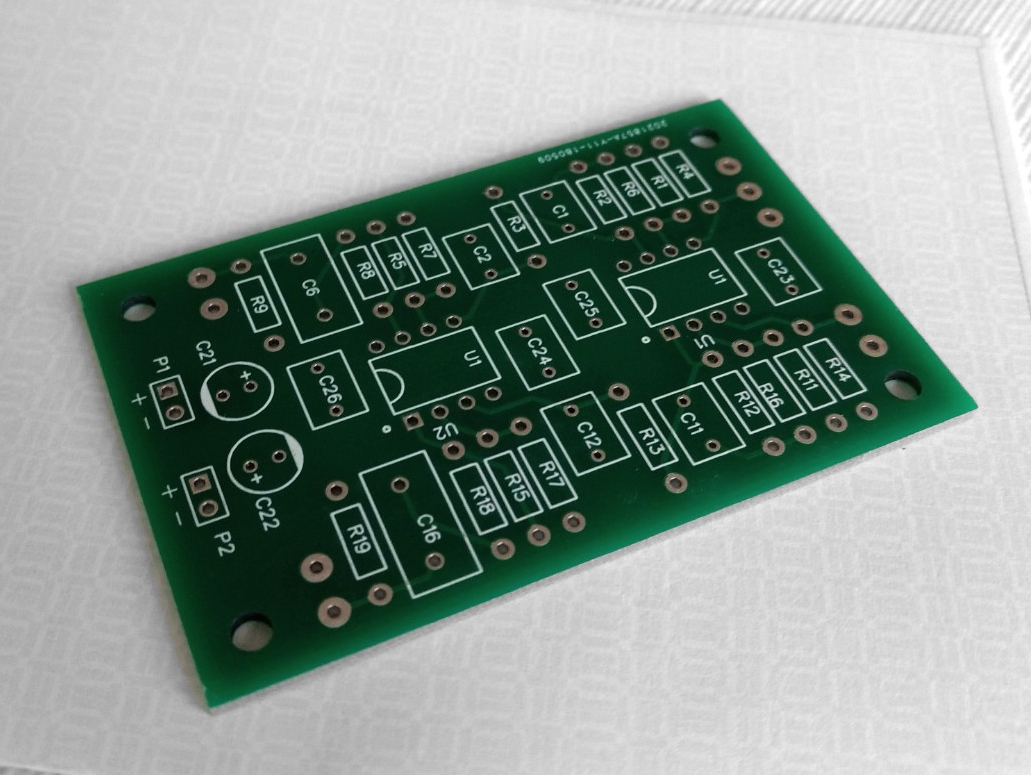
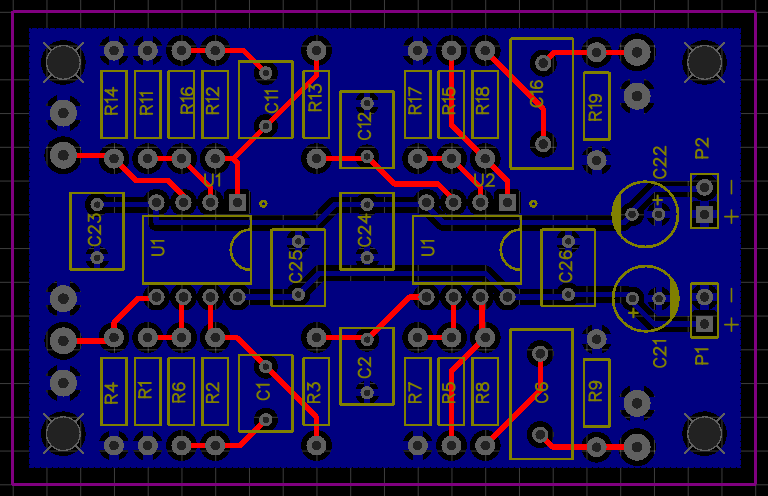
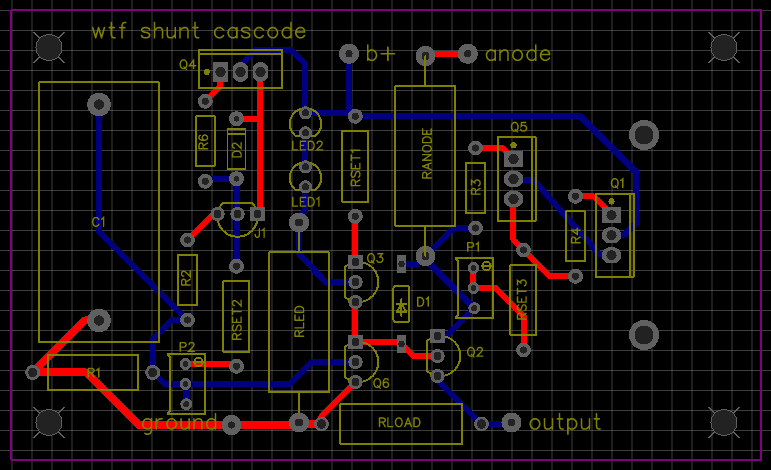
It looks like we could work with as low as a 100Vdc supply here, but plate resistance appears lower and more consistent if we have 150Vdc on tap. With 150V B+, a 7.5k loadline passes right through the middle of my target zone of operation, intersecting the y axis at 150V/7500 ohms = 20mA. A 220 ohm cathode resistor looks like a good place to start and should allow a dozen or so milliamps through the triode. The result, fleshed out, looks something like this:

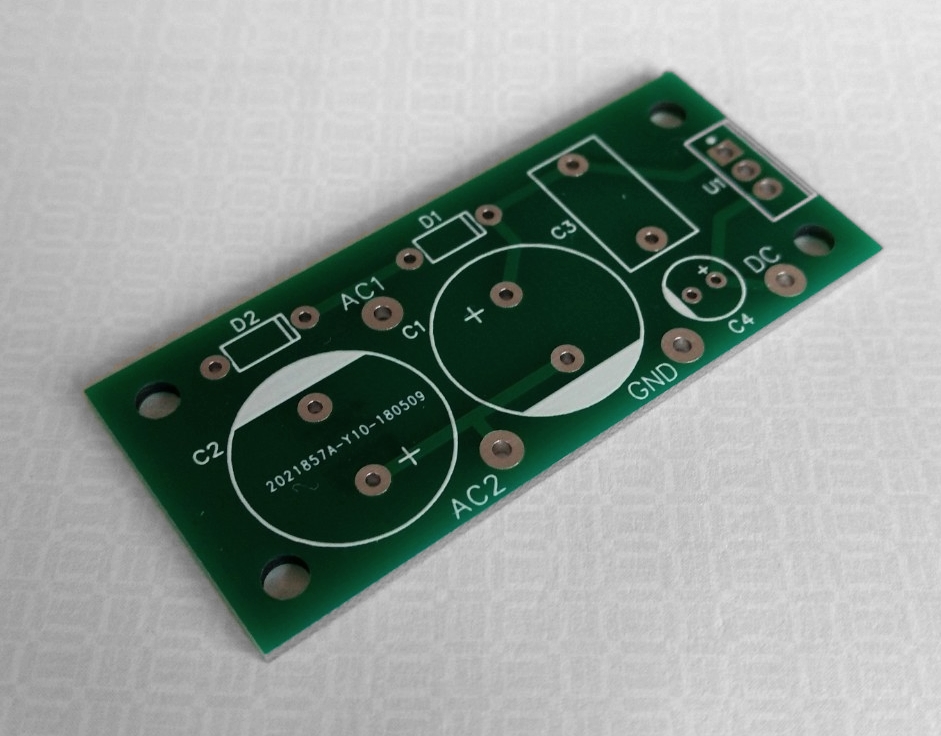
Back in my original post on the topic, I mused about 48V switching supplies wired in series to generate a B+. That’s a monkey I still haven’t gotten off my back, so I drew up a little PCB based on the XP Power VCE05 module. This is a $12 encapsulated AC/DC converter that puts out 100mA+ at 48V. Three in series gives ~150V in a very compact footprint and at a cost comparable to a small Hammond EI transformer.

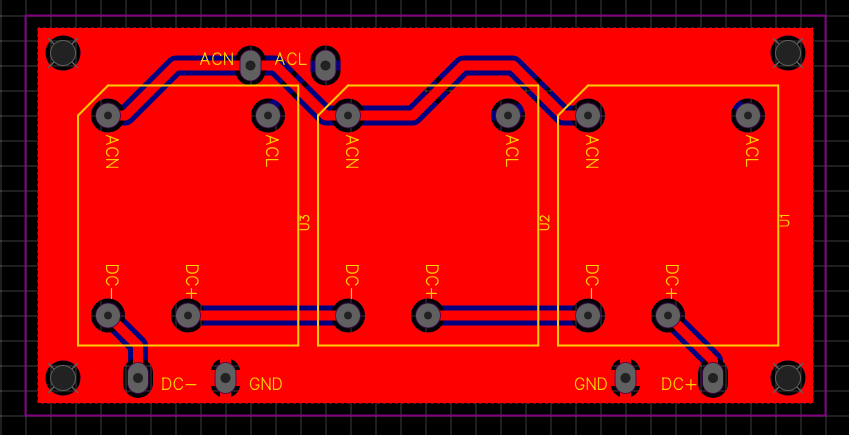
Although a pair of 6AF4s will only need 25mA or so, a pair of these boards would (hypothetically) be capable of powering a small power amplifier (300V @ 100mA). It’s worthy of some exploration.

Removing DIY barriers

It seems to me that there are three fundamental obstacles for beginners in the DIY tube hobby:

  • Layout and connection of component parts for best hum/noise performance
  • Choice of parts for correct and safe ratings/types/etc
  • Chassis fabrication and layout

Complete kits with chassis, parts, PCBs, and the whole ball of wax hit all of the points, but they are a daunting investment in both time and parts. See great examples from Bottlehead or Elekit. In a baby-steps approach, I’ve begun experimenting with putting entire circuits on a PCB design (image shows the El Estudiante). This addresses the first point.

I have ideas on ways to tackle the other challenges that minimize capital requirements and keep the hypothetical business idea agile and scalable (brushin off the old business and supply chain lingo). It might even be enough to turn into a respectable side-hustle. Hopefully I’ll be posting more on what I’m calling “quarter kits” in the near future.

New batch of boards!

Another batch of boards just arrived for some of my upcoming projects and experiments. These include:

  • MOSFET driver for A2 output stages
  • FW rectifier+voltage doubler combo on a compact board
  • MOSFET cap multiplier and CCS for DHT filaments
  • Shunt cascode boards v2 (slight layout changes to previous version)
  • MOSFET “gyrator” anode load
  • Low voltage bipolar supply (LM317 and LM337) for opamps

Some of these will be used for upcoming phono and line-stage builds while others are daydreams that I’ll get around to eventually 🙂

Reminder: extra PCBs are available for free or for purchase to my Patreon supporters

Los Monos are coming

Here’s a sneak peak of the long-term push-pull project. The second monoblock is one cathode bypass capacitor away from being ready for playback. A bad tester tube took out the cap on one side during testing with a bang, but I’ll have replacements soon. Until then here’s the intro of the project write up.

The monkey on your back

Everything should be made as simple as possible, but not simpler.

-Einstein

There comes a time in every DIY builder’s life where he or she gets the urge to stretch beyond single-digit output power and single-ended amplification. There is no shortage of worthwhile projects to choose from: variations on Williamson, Mullard, or Dynaco push-pull topologies are easy to find discussed in forums and tweaked to compensate for modern parts. You can even find kits for something like the Dynaco ST-70.

When the double-digit power bug bit me I could not bring myself to abandon my usual no-feedback, triode output, class A comfort zone. This is the simplest (but not the only) path to good sound and my speakers are efficient enough. I’m also too lazy to do feedback math but that doesn’t mean open-loop, class A triode designs aren’t an engaging challenge. This build faced the following complications (which are common to many push-pull amplifiers):

  • Class A requires healthy current in the output stage: this needs to be balanced in the output transformer to preserve inductance
  • Two cascaded grounded cathode input stages is too much gain, but one stage is generally not enough
  • The input stage must have low enough output impedance to drive the triode output tubes

For the most part, my solutions to the challenges strive for simplicity. As is often the case in tubes and life, simplicity in some areas is traded for complexity elsewhere. This push-pull amp has only two stages, the outputs are cathode biased, and it requires only three tubes per channel. To make this seeming simplicity possible, I used solid state helper circuits on PCBs. While these helper circuits are not technically complex, they drive up the parts count and require some measurement and adjustment.

Here is the conceptual topology for Los Monos:

Pictured is a two-stage triode output push-pull amplifier. The output stage is garter biased and the voltage gain and phase splitter stages are combined in a folded cascode long tail pair. This is all described below with a full schematic (showing lots more parts).

More of this write-up is on the way as soon as I’ve got both channels playing and glamour shots are taken!

Schitt is getting into DIY, except they’re definitely not

Pic from Schitt product page

If you’ve missed the recent hubbub, Schitt is launching a line of drink coasters. It just so happens that these coasters double as unsupported DIY projects with scarce documentation.

The schematic shows a 6418 sub-miniature triode direct connected to an AB push-pull transistor output stage (cap coupled). Power is a blistering 30V to the tube and 15V to the output stage, cleverly derived with a bridge doubler and regulated with LM317s.

Schitt is hedging the product with extra coy advertising (AKA the Schitt Shtick) and reinforcing in several places that they are not a DIY company. Hence the product is a coaster, not a miniature hybrid amplifier. It will come at no surprise to Schitt when DIY documentation is created by early adopter hobbyist communities, I’m sure.

Some of the quoted specs:

  • Frequency Response: not terrible, but not exciting (like 10-100K, -1dB or so)
  • Power Output: much less than anything else we make (like, less than Fulla 2, maybe 400mW into 32 ohms, all in, 10% THD or so)
  • THD: about 0.5% at 1V RMS (6418 tubes) or about 1.5% at 1V RMS (6088 tubes)
  • IMD: didn’t bother measuring, this amp ain’t about measurement
  • Output Impedance: about 8 ohms (yes, 8, not 0.8, not 0.08), in case you didn’t get the memo, this ain’t a high-performance amp

What is it about Schitt’s non-committal and self-effacing copy that gets so many people so excited?  Why did I just buy a small lot of 6418s? Why are coasters already on the way to me?

Schitt, you sly dogs.

Another batch of boards

Another small batch of prototype boards for projects has arrived. I’ll test these as soon as I find the time to stuff and test the last batch of experiments…

dc heaters
Simple 6.3V to 12V regulated heater board (LM7812 based), good for phono builds

mini booster
A miniature DC booster board with on-board USB charger for battery power B+

opamp phono
A simple opamp phono preamp powered by a couple of 9V batteries just because

Top 10 tips for PCBs on EasyEDA

I’m a believer in point-to-point construction, but not because I think it necessarily sounds any better. Point-to-point is simply the quickest and easiest way to try a new circuit. With tubes, high voltage caps, and through hole resistors, building without boards is straightforward (once you have some understanding of properly grounding circuits). When incorporating TO92, TO220, heatsinks, etc, a PCB starts to look much more appealing.

If you’ve been following my adventures, you’ve seen that I’ve been experimenting with PCBs recently. Most of my schematics are drawn in EasyEDA. EasyEDA is part of the JLCPCB family, where you can quickly import and order boards (you can also export Gerber files for purchasing elsewhere).  Based on my experience so far, and the advice of a cool dude name Matt, here are some thoughts and tips for working with EasyEDA/JLCPCB:

  1. Take advantage of the grid/snap spacing for layouts: I set my grid to 125mil (1/8″), the snap to 31.25mil (1/32″), and the alt snap to 12.5mil.eda grid
  2. Create m3/4-40 mounting holes: I make my holes 125mil (1/8″)
  3. Make all connections on one side of the board (where possible)
  4. Use the reverse side as a ground planephono.png
  5. Don’t be shy about creating your own parts (this is the PCB Lib function)!
  6. Don’t use standard TO92 packages; use TO92 ammo package footprintsto92
  7. Enlarge holes for wire-to-board connections and make the pads generous where you can
  8. My preference is to keep tube sockets off boards to prevent footprint issues, board flexing, and keep heater wiring flexible
  9. Avoid parallel tracks for anything carrying AC (signal or power): see Doug Self for good reading on coupling
  10. Add multiple hole connections for film caps (options for multiple radial and axial types)film cap

April/May has been a whirlwind in the WTF Amps household, but we should be returning to actual building soon. I’ve got about 30lbs of transformers and aluminum plates impatiently waiting for some actual hobby time to shake out of my schedule. Big boy mono blocks.

Board prototypes on the way

Although I love wiring tubes point to point, there are times where some TO92 or other small parts are needed. These often benefit from short leads, making layout and spacing critical. One of my upcoming projects makes these kinds of demands. Having dealt with death-by-soldering iron and oscillations when trying to point to point wire small parts in the past, I decided to try my hand at some small boards to make things easier on myself.

I still believe that for tubes there are real advantages to p2p wiring and turret strips. After all, they’re fairly large robust parts and part of the fun of building something is scavenging enclosures, optimizing the layout and grounding, etc. But where a small solid state circuit is needed, a modular board is great to have.

More to come on these boards once I’ve been able to test them and use them in builds.

ccs board finalreg board finalshunt board final